
Plenty of WordPress content starts life in a spreadsheet — a product list a vendor emails over, a staff directory HR maintains, an events calendar marketing edits weekly. Getting that data into WordPress usually means someone copy-pasting it into the block editor or a custom-fields panel, row by row, every time the sheet changes. This guide covers how to sync Google Sheets and WordPress without code, so spreadsheet rows become — and stay — live posts, pages, or custom field values.
Why sync Google Sheets with WordPress
Google Sheets and WordPress each do one job well, and most teams want to keep it that way rather than force one tool to do both:
- Non-technical staff can keep editing data in a spreadsheet — no WordPress login, no admin training — while the site reflects changes automatically.
- A sheet fed by a form, a supplier export, or another internal tool becomes a live source for WordPress posts or custom fields, instead of a one-time import that goes stale.
- WordPress stays the publishing and presentation layer — themes, SEO plugins, page templates — while the sheet stays the easy-to-edit data layer feeding it.
Manually re-typing rows into WordPress is fine for a handful of static pages. It breaks down once a catalog, directory, or events list changes often enough that someone has to remember to update both the sheet and the site.
What you need before you start
- A Google Sheet with a stable header row — one column per WordPress field (title, body, custom field, featured image URL, etc.) you want to populate.
- A WordPress site with the post type or custom fields shaped to receive that data (standard posts/pages, or ACF-style custom fields).
- A Synquake account — sign up free at app.synquake.com.
No WordPress REST API scripts, no plugin-chaining, no manual CSV re-imports every time the sheet changes. Synquake connects to the Google Sheets and WordPress APIs directly.
Step-by-step: connecting Google Sheets and WordPress
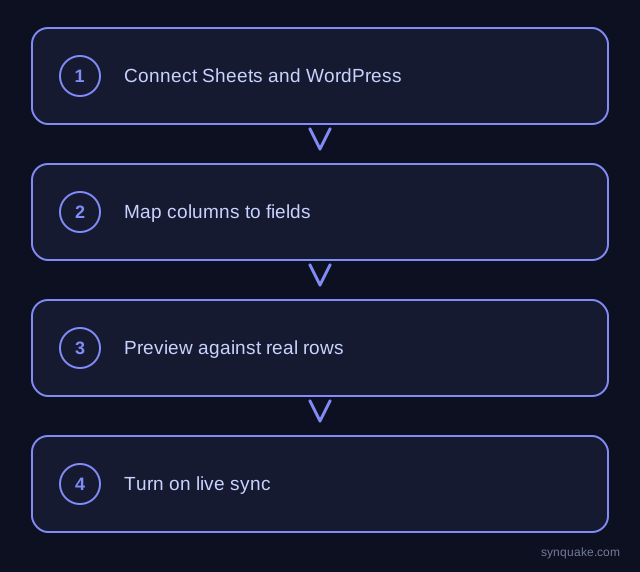
1. Connect both accounts
Add Google Sheets and WordPress as connections in Synquake. Google Sheets authorizes through Google OAuth; WordPress connects through your site’s own authentication. Neither requires a developer to hand-wire API keys.
2. Pick your sheet and destination
Choose which Google Sheet — and which tab — maps to which WordPress post type or page set. A “Products” tab syncing to a Products post type, or an “Events” tab syncing to Events, are typical starting points.
3. Map fields visually
Draw the connections between spreadsheet columns and WordPress fields. A text column can map to the post title or body; a URL column can map to a featured image field, with Synquake fetching and attaching the image rather than storing a bare link; other columns map to custom fields your theme or plugin already reads.
4. Choose sync direction
Pick one-way (Sheets → WordPress, for content authored only in the spreadsheet) or two-way, so edits made directly in WordPress flow back into the sheet too. Two-way sync is included on every Synquake plan, not a paid add-on.
5. Preview before going live
Run a preview sync against real rows before publishing anything. Confirm custom fields land where your theme expects them and featured images resolve — those are the two places a spreadsheet-to-WordPress sync most often needs adjustment.
6. Turn on live sync
Once the preview looks right, enable scheduled or real-time sync. From there, new rows become new posts or pages and edited rows update existing ones — nobody has to open wp-admin to publish a change.
Common Google Sheets–WordPress sync scenarios
- Spreadsheet-managed product or resource listings: Ops or marketing maintains the list in Google Sheets; Synquake keeps live WordPress posts or custom-field values current without anyone touching wp-admin directly.
- Staff or partner directories: A sheet edited by HR or an office manager syncs into a WordPress directory page, so the public listing stays accurate without a manual update pass.
- Editorial calendars: A content team plans and drafts in Sheets; approved rows sync into WordPress as published or scheduled posts.
- Feed-driven listings: A sheet populated by a supplier export or another tool becomes the live input for a WordPress custom post type, without a developer building a one-off importer.
Avoiding common sync problems
- Unstable headers: Keep column headers fixed once sync is live — renaming a header reads as a new field, not an update to the old one.
- Custom field mismatches: Confirm the WordPress field keys match what your theme or plugin actually reads before mapping columns — a typo’d field key syncs data nowhere visible.
- Image fields: Use direct, publicly accessible image URLs in the sheet — a link behind a login or a private Google Drive share won’t resolve into a WordPress featured image.
- Duplicate posts: Set a stable matching column (a slug, SKU, or ID) so re-running a sync updates existing posts instead of creating duplicates.
Beyond Google Sheets and WordPress
Synquake’s sync is any-to-any across eight platforms — Airtable, Webflow, WordPress, Supabase (including Lovable-built apps), Wix, Shopify, Squarespace, and Google Sheets — plus CSV import/export on every plan. The same Google Sheet feeding your WordPress posts can also feed a Shopify catalog, a Webflow Collection, or an Airtable base, without a separate integration for each. See the full integrations page for details, or read how it works for the connection, mapping, and monitoring model.
Related reading
- How to Sync Google Sheets and Webflow CMS Without Code
- How to Sync Google Sheets and Airtable Without Code
- Airtable to WordPress Sync Without Code
Get started
Syncing Google Sheets and WordPress without code takes minutes to set up and turns your spreadsheet into a live content source. Start your first Google Sheets-to-WordPress sync free and preview it against real rows before going live.