
Teams building on Supabase often need Shopify data — products, inventory, orders — available in their own Postgres tables, not locked inside the Shopify admin. Maybe you’re powering a custom storefront, a Lovable-built internal tool, or an app that needs live product data without hammering Shopify’s API on every request. This guide walks through how to sync Shopify to Supabase without code, so your Postgres backend reflects store changes in real time and can push updates back.
Why sync Shopify into Supabase
Shopify is the system of record for selling. Supabase is the backend for everything you build around the store — a Lovable app, a custom dashboard, a loyalty program, an internal reporting tool. Keeping the two in sync means:
- Your app queries a local Postgres table instead of round-tripping to Shopify’s API for every read.
- Product, inventory, and order data are queryable with plain SQL, joins, and Supabase’s row-level security.
- Changes made in your app or Postgres — a manual inventory correction, a status flag — can push back into Shopify automatically.
Without a live sync, teams end up writing one-off scripts to poll Shopify’s API on a cron job, which drifts out of date and breaks quietly the first time Shopify changes a rate limit or a field.
What you need before you start
- A Shopify store with admin access (to authorize an API connection).
- A Supabase project with a table shaped for your product data (or let Synquake help define columns for SKU, title, price, inventory, and status).
- A Synquake account — sign up free at app.synquake.com.
No developer time is required to wire this up — Synquake talks to Shopify’s and Supabase’s APIs directly, so there’s no custom script or webhook handler to maintain yourself.
Step-by-step: connecting Shopify and Supabase
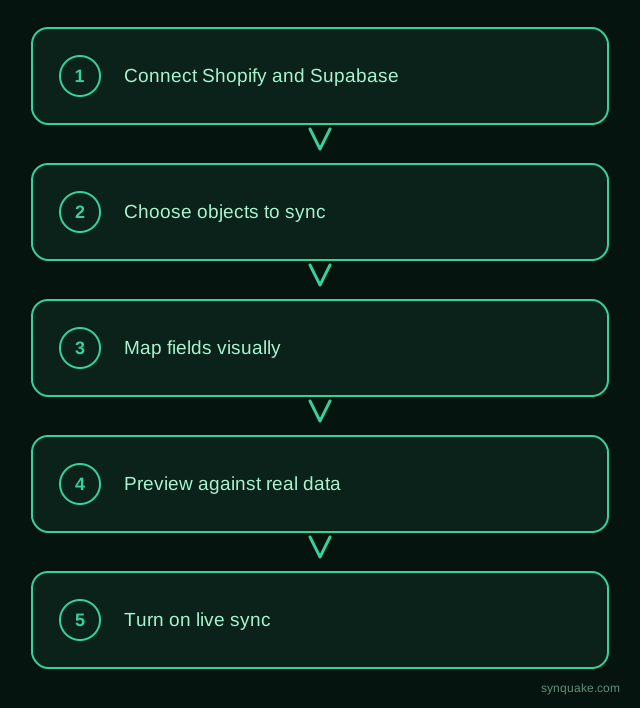
1. Connect both accounts
In Synquake, add Shopify and Supabase as connections. Shopify authorizes through OAuth; Supabase connects with your project’s connection details. Credentials stay scoped to the sync — no shared logins or hand-copied API keys across your team.
2. Choose what to sync
Pick which Shopify objects map to which Supabase tables. Most builds start with Products (and variants) into a products table, with Orders optionally flowing into a separate orders table for app-side reporting.
3. Map your fields visually
Draw the connections between Shopify fields (title, price, SKU, inventory quantity, tags, images) and their Supabase columns. Synquake handles type conversion and Shopify’s variant structure, so you don’t have to hand-write a transform layer.
4. Set sync direction
Choose one-way (Shopify → Supabase, for apps that only read store data) or two-way sync — so a status flag or manual correction made in Supabase pushes back into Shopify. All Synquake plans include 2-way sync and every connection; it isn’t gated to a higher tier.
5. Preview before going live
Run a preview sync against real products first, and check that rows land in Supabase with the right types — numeric fields as numbers, not strings, images as usable URLs — before enabling continuous sync.
6. Turn on live sync
Once the preview looks right, enable scheduled or real-time sync. From here, a price change or restock in Shopify appears in Supabase automatically, and any two-way updates flow back without a manual export step.
Common Shopify–Supabase sync scenarios
- Custom storefronts and Lovable apps: An app built on Supabase (including Lovable-built apps) reads live Shopify product and inventory data without calling Shopify’s API directly on every page load.
- Internal dashboards: Ops or fulfillment teams query Postgres directly for reporting, joins, and views that Shopify’s admin doesn’t offer.
- Loyalty or subscription logic: App-side tables track customer state alongside Shopify order data, synced in from Shopify rather than duplicated by hand.
- Multi-channel catalogs: The same Supabase-backed product data can also feed a Webflow, WordPress, or Squarespace site, since Synquake’s sync is any-to-any across all seven platforms.
Avoiding common sync problems
- Type mismatches: Confirm Supabase column types match what Shopify sends (numeric fields as
numeric/integer, nottext) before turning on two-way sync, or updates will fail silently. - Variant sprawl: Decide up front whether Shopify variants map to rows in the same table or a separate
variantstable — retrofitting this after go-live means a data migration. - Row-level security conflicts: If your Supabase table has RLS policies, make sure the sync’s service role can write to it, or writes will be silently rejected.
- Inventory race conditions: If both Shopify and an app can adjust stock counts, pick one system as the source of truth for inventory, or rely on last-modified timestamps to resolve conflicts.
Beyond Shopify and Supabase
Synquake’s sync is any-to-any across seven platforms — Airtable, Webflow, WordPress, Supabase (including Lovable-built apps), Wix, Shopify, and Squarespace — plus CSV import/export on every plan. That means the same Supabase table you sync from Shopify can also power a Webflow or Squarespace front end, or feed an Airtable base for merchandising, without a separate integration for each pair. See the full integrations page for details, or read how it works to understand the connection, mapping, and monitoring model.
Related reading
- How to Sync Shopify Products to Airtable Without Code
- Lovable Supabase Sync: Build AI Apps on Live Data
- Airtable vs Supabase: Sync or Migrate?
Get started
Syncing Shopify into Supabase gives your app a live, queryable copy of your store without polling Shopify’s API yourself. Start your first Shopify-to-Supabase sync free and preview it against real product data before going live.