Contentful is built for structured, API-first content delivery — not for the loose, spreadsheet-style planning and review work that content teams actually do day to day. Airtable fills that gap well, but only if what’s in Airtable matches what’s live in Contentful. Copying entries back and forth by hand works for a one-time import, then quietly breaks down as both sides keep changing. This guide covers how to sync Contentful and Airtable without code, in either direction.
Why sync Contentful with Airtable
Contentful and Airtable solve different problems that both show up in the same content workflow:
- Editorial planning in Airtable, delivery through Contentful. Writers and editors plan, draft, and review content in an Airtable base with statuses, assignees, and due dates — fields Contentful’s entry editor isn’t built for — then push finished entries into Contentful for delivery to the website or app.
- Reporting on live Contentful content. Pull published Contentful entries into Airtable so marketing or ops can filter, sort, and report on content without touching the Contentful web app or its API directly.
- Bulk content operations. Make large edits to many entries at once in an Airtable grid, then sync the changes back into Contentful instead of editing one entry at a time.
A one-time CSV export into Contentful’s import tool handles a single migration moment. It doesn’t hold up once either side keeps changing weekly, which is the normal state for an active content team.
What you need before you start
- A Contentful space with the content model (entries, fields, references) you want to sync.
- An Airtable base with a table shaped to mirror the Contentful content type — fields, linked records, and attachments as needed.
- A Synquake account — sign up free at app.synquake.com.
No developer, no custom Contentful app, and no Airtable scripting required. Synquake connects to the Contentful and Airtable APIs directly.
Step-by-step: connecting Contentful and Airtable
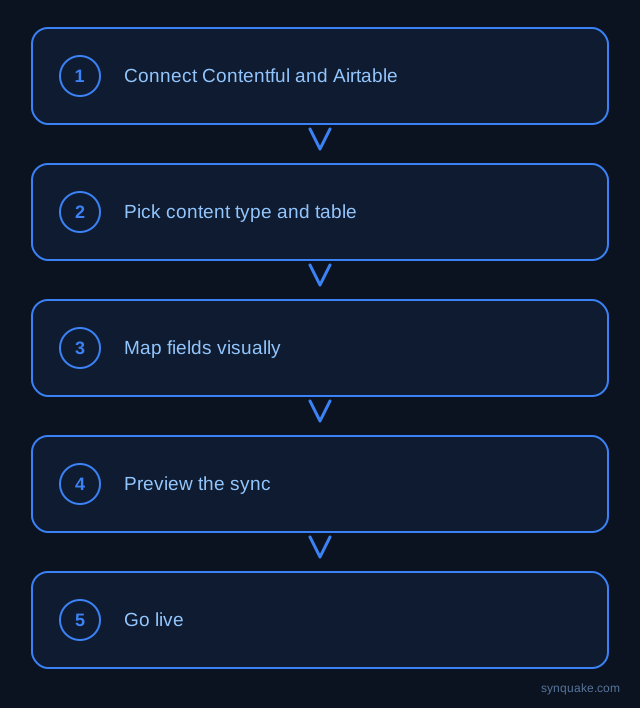
1. Connect both accounts
Add Contentful and Airtable as connections in Synquake. Contentful authorizes with a space-scoped API token; Airtable through OAuth on the base you choose. No tokens get passed around the team manually.
2. Pick what to sync
Choose the Contentful content type (or specific entries) and the Airtable table you want connected. Most teams start with one content type — blog posts or product pages are common first picks — then expand once the mapping is proven.
3. Map fields visually
Draw the connections between Contentful fields (short text, rich text, references, media) and Airtable’s field types. Field types don’t need to match exactly up front — Synquake handles the conversion, including Contentful reference fields mapping to Airtable linked records and Contentful asset fields mapping to Airtable attachments.
4. Choose sync direction
Pick one-way (Airtable → Contentful for an editorial-planning workflow, or Contentful → Airtable for reporting on live content) or two-way sync, so an edit made on either platform pushes to the other automatically. Two-way sync is included on every Synquake plan, not a paid upgrade.
5. Preview before going live
Run a preview sync against a handful of real entries first. Confirm rich text formatting, reference links, and media fields land correctly on the receiving side before enabling continuous sync.
6. Turn on live sync
Once the preview checks out, enable scheduled or real-time sync. From here, an entry update, status change, or new record on either platform flows to the other automatically, with no manual re-export step.
Common Contentful–Airtable sync scenarios
- Editorial workflow: Writers draft and track status in Airtable; approved entries sync to Contentful for publishing, without copy-pasting content between the two.
- Content audits and reporting: Pull all Contentful entries into Airtable so a non-technical team can filter by status, author, or last-updated date without learning the Contentful app.
- Bulk edits: Update dozens of entries at once in an Airtable grid view, then sync the changes back to Contentful instead of opening each entry individually.
- Migration staging: Stage content for a new Contentful content model in Airtable first, validate it there, then sync it in once the model is finalized.
Avoiding common sync problems
- Rich text mismatches: Contentful’s rich text field has more structure than an Airtable long-text field — confirm formatting (bold, links, embedded entries) survives the mapping before relying on two-way sync for rich text content.
- Reference fields: Set a stable matching key (a slug or Contentful entry ID stored in Airtable) so linked entries resolve correctly instead of creating duplicate references.
- Locale handling: If the Contentful space uses multiple locales, confirm which locale syncs to Airtable — syncing the wrong one silently delivers the wrong language.
- Publish state: Decide whether Airtable syncs against draft or published Contentful entries, so reviewers aren’t working from content that isn’t live yet (or won’t be).
Beyond Contentful and Airtable
Synquake’s sync is any-to-any across nine platforms — Airtable, Webflow, WordPress, Supabase (including Lovable-built apps), Wix, Shopify, Squarespace, Google Sheets, and Contentful — plus CSV import/export on every plan. The same Contentful space you sync with Airtable can also feed from a Webflow CMS collection, a WordPress site, or a Google Sheet, without building a separate integration for each. See the full integrations page for details, or read how it works for the connection, mapping, and monitoring model.
Related reading
- How to Sync Google Sheets and Airtable Without Code
- How to Sync Google Sheets and Webflow CMS Without Code
- Airtable Webflow Sync Errors: Fixes That Stick
Get started
Syncing Contentful and Airtable without code takes minutes to set up and removes the manual copy-paste step from editorial planning or content reporting. Start your first Contentful-to-Airtable sync free and preview it against real entries before going live.