
Plenty of Shopify stores are actually run from a spreadsheet first — a merchandiser drafts new products in Google Sheets, a supplier sends stock counts as a shared sheet, or someone just prefers editing prices in rows and columns instead of the Shopify admin. The gap shows up when that sheet and the live store stop matching. This guide covers how to sync Google Sheets and Shopify without code, so the spreadsheet your team already uses stays a real input or output for the store, not a one-time import.
Why sync Google Sheets with Shopify
Google Sheets and Shopify solve different problems, and most stores end up needing both connected rather than picking one:
- Merchandising, ops, or supplier teams can draft and edit product data in a spreadsheet without needing Shopify admin access.
- A Google Sheet used for planning new products or seasonal pricing becomes a live input to Shopify instead of a manual CSV upload each time it changes.
- Inventory or pricing counts in Shopify can flow out to a Google Sheet for teams that want a lightweight, filterable view without logging into Shopify at all.
Shopify’s own CSV import works fine for a one-time catalog load. It breaks down once either side — the sheet or the store — changes daily, which for an active shop is most days.
What you need before you start
- A Google Sheet with a clear header row and consistent columns for the product fields you’re syncing (title, SKU, price, inventory, etc.).
- A Shopify store with admin access to create a connection.
- A Synquake account — sign up free at app.synquake.com.
No Apps Script, Shopify Flow, or manual CSV re-uploads required. Synquake connects to the Google Sheets and Shopify APIs directly.
Step-by-step: connecting Google Sheets and Shopify
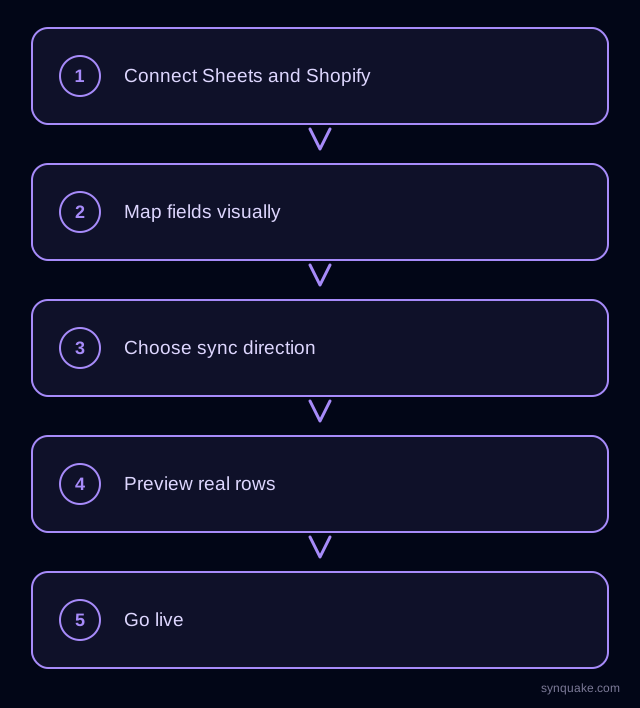
1. Connect both accounts
Add Google Sheets and Shopify as connections in Synquake. Google Sheets authorizes through Google OAuth; Shopify authorizes through its own OAuth flow. Neither requires handing out a shared API key.
2. Pick your sheet and store objects
Choose which Google Sheet — and which tab — maps to which Shopify object. A “New Products” tab syncing into Shopify Products, or a supplier’s “Stock Counts” tab syncing into Inventory, are common starting points.
3. Map fields visually
Draw the connections between spreadsheet columns and Shopify fields (title, price, SKU, inventory quantity, tags, images). Types don’t need to match up front — Synquake handles the conversion, including turning a comma-separated Sheets column into Shopify tags or variant options.
4. Choose sync direction
Pick one-way (Sheets → Shopify, if the spreadsheet is just where new products or price updates get drafted) or two-way sync, so live Shopify data — like current stock levels — flows back into the sheet for anyone who only works there. Two-way sync is included on every Synquake plan, not a paid upgrade.
5. Preview before going live
Run a preview sync against a handful of real rows first. Confirm prices, SKUs, and inventory numbers land correctly — currency formatting and SKU mismatches are the two most common places a spreadsheet-to-store sync goes wrong.
6. Turn on live sync
Once the preview looks right, enable scheduled or real-time sync. From here, updates on either side — a new row in the sheet, a stock change in Shopify — propagate automatically.
Common Google Sheets–Shopify sync scenarios
- Spreadsheet product drafting: A merchandising team drafts new products and pricing in Google Sheets; Synquake pushes approved rows into Shopify as live products.
- Supplier and dropship stock updates: A supplier maintains stock counts in a shared Google Sheet, which syncs into Shopify inventory without giving them store access.
- Read-only reporting view: Current Shopify inventory and order data sync out to a Google Sheet for finance or ops teams who prefer spreadsheet pivot tables to a BI tool.
- Multi-channel catalog planning: A single Google Sheet feeds Shopify plus a separate site built on Webflow, WordPress, or Squarespace, keeping pricing and descriptions consistent across every channel.
Avoiding common sync problems
- SKU mismatches: Use a stable SKU or product ID column as the match key so re-running a sync updates existing Shopify products instead of creating duplicates.
- Variant structure: Map spreadsheet columns for size, color, or other options to Shopify’s variant structure before turning on two-way sync — this is the most common source of duplicate or malformed products.
- Currency and number formatting: Normalize price columns (no currency symbols, consistent decimals) before the first live sync so Shopify doesn’t reject the update.
- Inventory race conditions: If both the sheet and Shopify can change stock counts, pick one system as the authority, or rely on last-modified timestamps to resolve conflicts.
Beyond Google Sheets and Shopify
Synquake’s sync is any-to-any across eight platforms — Airtable, Webflow, WordPress, Supabase (including Lovable-built apps), Wix, Shopify, Squarespace, and Google Sheets — plus CSV import/export on every plan. The same Google Sheet you sync with Shopify can also feed an Airtable base, a Webflow site, or a Supabase-backed app, without a separate integration for each. See the full integrations page for details, or read how it works for the connection, mapping, and monitoring model.
Related reading
- How to Sync Google Sheets and Airtable Without Code
- How to Sync Shopify Products to Airtable Without Code
- Shopify vs Squarespace for a No-Code Data Stack
Get started
Syncing Google Sheets and Shopify without code takes minutes to set up and replaces manual CSV uploads for good. Start your first Google Sheets-to-Shopify sync free and preview it against real product data before going live.