
Plenty of teams sell on Shopify but build their marketing site, landing pages, or a richer product catalog experience in Webflow — Shopify for checkout and fulfillment, Webflow for design control over everything else. The catch is keeping both in step: a price change or new product in Shopify needs to show up in Webflow’s CMS without someone copying fields by hand every time inventory shifts. This guide covers how to sync Shopify and Webflow without code, in either direction.
Why sync Shopify with Webflow
Shopify and Webflow are built for different jobs — Shopify for commerce and order processing, Webflow for a flexible, design-led CMS and marketing site. Syncing the two lets you:
- Showcase Shopify products on custom Webflow landing pages or collection layouts Shopify’s own themes can’t produce.
- Keep a Webflow CMS Collection of products current automatically as prices, stock, or descriptions change in Shopify.
- Let content or marketing teams manage product copy and imagery in Webflow’s CMS while Shopify stays the system of record for inventory and orders.
Re-exporting a product CSV from Shopify into Webflow works once, for a launch. It falls apart the moment stock levels or prices change daily, which they always do.
What you need before you start
- A Shopify store with admin access to Products (and variants, if relevant).
- A Webflow site with a CMS Collection shaped to match — fields for title, price, inventory status, images, and any custom attributes.
- A Synquake account — sign up free at app.synquake.com.
No developer, no Webflow custom code embed, and no Shopify app-store integration to maintain. Synquake connects to the Shopify and Webflow APIs directly.
Step-by-step: connecting Shopify and Webflow
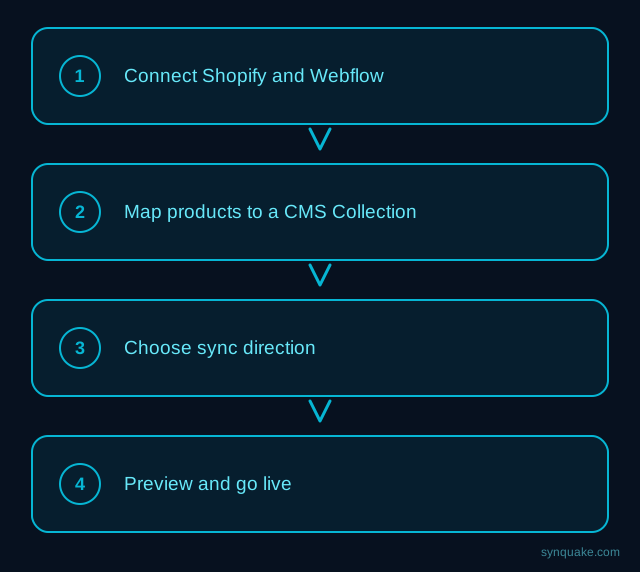
1. Connect both accounts
Add Shopify and Webflow as connections in Synquake. Shopify authorizes through OAuth; Webflow through OAuth on the site you choose. Neither side requires passing API keys around the team manually.
2. Choose what to sync
Decide which Shopify object maps to which Webflow CMS Collection — most stores start with Products (and variants) mapping to a Webflow “Products” Collection, with Shopify as the source for catalog data.
3. Map fields visually
Draw the connections between Shopify fields (title, price, SKU, inventory quantity, tags, images) and Webflow CMS fields. Field types don’t need to match exactly up front — Synquake handles the conversion, including Shopify images mapping to Webflow’s asset-based image field and Shopify variants mapping to a consistent Webflow structure.
4. Choose sync direction
Pick one-way (Shopify → Webflow, for teams that only edit product data in Shopify) or two-way sync, so content edits made directly in Webflow’s CMS — like marketing copy or a featured flag — push back to Shopify as metafields. Two-way sync is included on every Synquake plan, not a paid upgrade.
5. Preview before going live
Run a preview sync against a handful of real products first. Confirm prices, inventory status, and images land in the correct Webflow CMS fields — and render correctly on a live Webflow collection page — before enabling continuous sync.
6. Turn on live sync
Once the preview checks out, enable scheduled or real-time sync. From here, a price change or restock in Shopify flows into Webflow automatically, with no manual re-export step.
Common Shopify–Webflow sync scenarios
- Design-led storefront: Teams that want more visual control than Shopify’s theme system allows build the shopping experience in Webflow while Shopify handles checkout and payments behind the scenes.
- Landing pages with live pricing: Marketing builds campaign-specific Webflow pages that pull current Shopify price and stock data instead of a snapshot that goes stale after the next price update.
- Content-first catalog: A content team manages rich product storytelling in Webflow’s CMS, while Shopify stays the single source of truth for inventory and order fulfillment.
- Multi-channel selling: Stores selling through Shopify and a Webflow-built site keep the two catalogs aligned without maintaining a separate app subscription for the connection.
Avoiding common sync problems
- Variant mismatches: Map Shopify variants (size, color) to a consistent Webflow CMS structure before enabling two-way sync — mismatched variants are the most common source of duplicate CMS items.
- Image handling: Shopify product images sync as URLs; confirm the Webflow side is configured to fetch and host them as Webflow assets rather than leaving broken image links.
- Inventory status fields: Decide whether out-of-stock Shopify products should sync to Webflow as hidden, unpublished, or simply flagged — this avoids live collection pages promoting items nobody can buy.
- Checkout links: Keep any “Buy now” links on Webflow-rendered product pages pointing at the correct Shopify checkout URL, especially after a product or variant ID changes.
Beyond Shopify and Webflow
Synquake’s sync is any-to-any across eight platforms — Airtable, Webflow, WordPress, Supabase (including Lovable-built apps), Wix, Shopify, Squarespace, and Google Sheets — plus CSV import/export on every plan. The same Webflow CMS Collection you sync with Shopify can also feed from an Airtable base, a Supabase table, or a Google Sheet, without a separate integration for each. See the full integrations page for details, or read how it works for the connection, mapping, and monitoring model.
Related reading
- How to Sync Squarespace and Webflow Without Code
- How to Sync Shopify Products to Airtable Without Code
- Shopify to Supabase Sync: Build a Real-Time Product Backend
Get started
Syncing Shopify and Webflow without code takes minutes to set up and keeps your catalog accurate across both without a manual re-export cycle. Start your first Shopify-to-Webflow sync free and preview it against real product data before going live.